Why Your Back Tightens Up the Moment You Hit the Pillow
If you've ever laid down after a long day expecting relief, only to feel your lower back stiffen into a knot the second your head touches the pillow, you know the frustration. The question is not just "how to sleep with tight back muscles" - it's why the tightness seems to spike right when you're trying to rest.
The short answer: it's not just your mattress. Your back tightness at night is a compound problem involving circadian inflammation, stress hormones, and cumulative spinal compression from the day. The good news is that you can reset all three before you sleep if you know the right sequence.
This guide walks you through a 5-minute pre-sleep protocol that targets the root cause of nighttime back tightness - not just the symptoms. You'll learn why your back seizes up at night, how to decompress your spine while sleeping, and the exact positioning and hydration habits that make the biggest difference.
The Root Cause: Why Is My Back So Tight at Night?
Most people assume their back tightness is purely mechanical - a product of poor posture or a weak core. But the reason it flares at night specifically points to something deeper. Your body's natural cortisol rhythm dips in the evening, which means inflammation has less of a chemical brake holding it back. If you have any latent inflammation in your spinal joints, it amplifies at night.
There's also the stress factor. If you carry tension in your back during the day - and most people do without realizing it - your nervous system keeps those muscles firing even when you're horizontal. This is called muscle guarding. It's your body's primitive way of protecting an area it thinks is vulnerable, but at night it just keeps you locked up.
The third factor is spinal compression. Throughout the day, gravity squeezes your intervertebral discs, forcing water out of them. By bedtime, your spine is measurably shorter than it was in the morning. That compression irritates the nerves that exit your spinal column, and your back muscles tighten in response. This is why the question "how to decompress spine while sleeping" is so important - but the decompression has to start before you're even in bed.
The Nighttime Tightness Reset: A 5-Minute Pre-Sleep Protocol
I developed this protocol after years of waking up with a stiff lower back despite using every pillow arrangement in the book. What I realized was that no sleeping position can fix a spine that's already compressed and a nervous system that's still in fight-or-flight mode. You have to reset both before you even think about your pillow setup.
The protocol takes five minutes, no more. It combines three elements: diaphragmatic breathing to lower cortisol, gentle traction to decompress the spine, and a specific hydration timing trick that prevents overnight muscle cramping.
Step 1: The 90/90 Breathing Reset
Lie on your back with your legs resting on the edge of your bed - calves on the mattress, knees bent at 90 degrees. This position naturally tilts your pelvis into a neutral angle, taking tension off your psoas muscle, which is the deep hip flexor that attaches to your lower spine. When your psoas is tight, it yanks your lumbar spine forward. This position is the first step in releasing it.
Place one hand on your belly, one on your chest. Breathe in through your nose for four counts, directing the air down into your belly so your hand rises. Exhale slowly through your mouth for six counts. The longer exhale activates your parasympathetic nervous system, which is what tells your back muscles to stop guarding. Do this for two minutes.
What can go wrong: if you feel lightheaded, you're breathing too deeply. Dial it back. The goal is not maximal breath, it's a calm rhythm. Most people don't realize that the exhale is more important than the inhale for muscle relaxation - the vagus nerve responds specifically to the lengthening of the exhale.
Step 2: Traction Over the Bed Edge
Still on your back, shift so your upper back is resting on the mattress, but let your legs hang off the edge of the bed, knees bent, feet on the floor. You're now in a position that looks like a gentle back bend over the edge. This is called traction - it uses gravity to create space between your vertebrae.
Stay here for 90 seconds. You should feel a lengthening sensation through your lower back, not pain. If you feel a sharp pinch, stop immediately and return to the breathing position. This technique is not appropriate for everyone - if you have a herniated disc or spinal stenosis, skip this step and stick with the breathing only.
The thing nobody tells you about traction: it's not about hanging or pulling hard. It's about letting gravity do the work while your muscles stay relaxed. If you tense up, you defeat the purpose. The 90/90 breathing before this step is what makes it work.
Step 3: The Hydration Timing Fix
Dehydration is one of the most overlooked causes of nocturnal back tightness. Your intervertebral discs are mostly water. When you're dehydrated, they lose fluid and become less spongy, which means more direct pressure on your nerve roots. But drinking a glass of water right before bed is not the answer - you'll just wake up to pee at 3 AM.
The fix is hydration timing. Aim to finish your last full glass of water 2 hours before bed. Then, 30 minutes before you start the breathing protocol, drink a small sip - about a quarter glass. This tops off your discs without filling your bladder overnight. If you're someone who sweats heavily during the day or exercises in the evening, you may need an extra half glass during that window.
I learned this the hard way. I used to think drinking a big glass of water before bed was healthy, and then I'd wake up with both a full bladder and a stiff back. The stiffness was partly from the disrupted sleep and partly from the fact that my body was still processing the water load during the night.
Sleeping Positions That Actually Decompress the Spine
Once you've done the reset, the position you sleep in matters. But not for the reasons most articles claim. It's not about finding a "perfect" position - it's about maintaining the decompression you just created. Here's how each common position affects your back, with the nuance most guides miss.
Side Sleeping: The Underrated Hip Trick
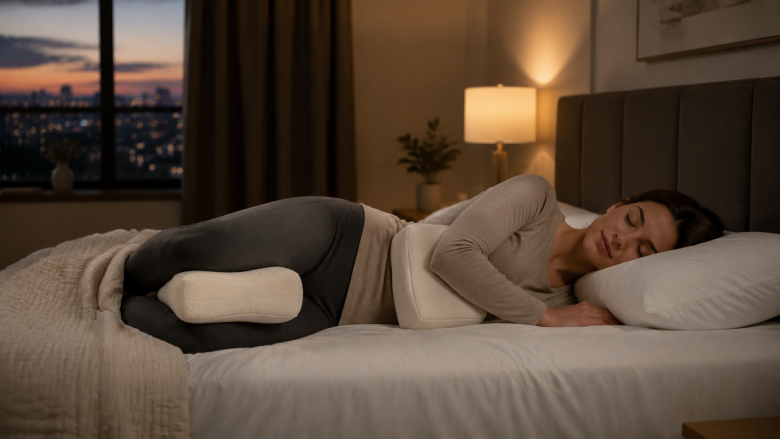
Side sleeping is the most popular position, and it's good for back tightness if you do it right. The key is not just placing a pillow between your knees - it's about the relationship between your hips and your mattress. If your mattress sinks too much at the hip, your spine bends into a lateral curve. If it's too firm, your top leg pulls your pelvis forward.
The fix is a pillow between your knees that's thick enough to keep your top hip level with your bottom hip. But here's the detail most guides miss: the pillow should extend down to your ankles, not just your knees. This prevents your top leg from rotating and pulling on your lower back through the night.
When I first started using a knee pillow, I used a thin one and wondered why my back still hurt. The issue was that my ankles were touching, which kept my leg internally rotated. Switching to a thicker pillow that supported my whole leg made a noticeable difference within a week.
Back Sleeping: The Two-Pillow System
Back sleeping is often recommended for spinal alignment, but it's actually the hardest position to maintain if you have lower back tightness. The problem is that your lumbar spine has a natural curve, and if your mattress is too firm, that curve gets flattened. If it's too soft, your hips sink and your spine arches.
The solution is a two-pillow system. Place one pillow under your knees and one under your lower back - but not the way you might think. The knee pillow should be firm enough to keep your knees slightly bent, which takes tension off your psoas. The lower back pillow should be thin - think a rolled-up hand towel - placed in the curve of your lower back to provide support without pushing you into hyperextension.
Most people only use a knee pillow and wonder why their back still hurts. The lower back support is what actually maintains the decompression you created in the traction step. Without it, your back muscles have to work all night to hold your spine in a neutral position.
Stomach Sleeping: The Hard Truth
Stomach sleeping is the worst position for back tightness, and if you're reading this article, I'm going to ask you to consider transitioning away from it. When you sleep on your stomach, your neck is rotated to one side for hours, and your lower back is arched into extension. This compresses the facet joints in your spine and tightens your back muscles by morning.
If you absolutely cannot sleep any other way, the compromise is to place a thin pillow under your pelvis, not your head. This flattens your lower back slightly and reduces the arch. But honestly, this is a temporary fix. I've worked with people who broke the stomach-sleeping habit by using a body pillow as a barrier - it physically prevents them from rolling onto their stomach during the night.
Beyond Pillows: The Muscles That Lock Your Back Up
Even with perfect positioning, you can still wake up tight if you ignore the muscles that connect your back to your hips. The psoas, the quadratus lumborum (QL), and the piriformis are the three main culprits. They all refer tension into your lower back, and they all respond to specific stretches and releases that are different from the generic "knee-to-chest" move you see everywhere.
The Psoas: Your Hidden Hip Flexor
The psoas muscle runs from your lower spine through your pelvis and attaches to your femur. It's the only muscle that connects your spine to your legs, and it gets tight from sitting. When it's tight, it pulls your lumbar spine into excessive curvature, which causes back tightness.
The best pre-sleep stretch for the psoas is the low lunge, but with a crucial modification: instead of reaching your arms overhead, keep your hands on your front knee. This keeps your pelvis in a neutral position. Hold for 45 seconds per side. You should feel a deep stretch in the front of your hip, not your back.
The QL: The Muscle Nobody Stretches Properly
Your quadratus lumborum is a deep muscle on either side of your lower spine. It's responsible for side-bending and stabilizing your pelvis. It gets tight from any asymmetry in your day - carrying a bag on one shoulder, standing with your weight shifted, even sleeping in a curled position.
The stretch that works is the side-lying reach. Lie on your side with your bottom leg bent and top leg straight. Reach your top arm overhead and let it hang toward the floor. You should feel a stretch along your waist and lower back. Hold for 45 seconds per side. This is a gentle release, and it's safe to do right before bed because it doesn't stimulate your nervous system the way a more aggressive stretch would.
The Piriformis: The Butt Muscle That Lies
The piriformis is a small muscle in your buttocks that rotates your hip. When it's tight, it can compress your sciatic nerve, which manifests as back pain that radiates down your leg. The classic figure-four stretch is good, but the version that works best for sleep is the supine piriformis stretch.
Lie on your back with both knees bent. Cross your right ankle over your left knee, then gently pull your left thigh toward your chest. You'll feel a deep stretch in your right buttock. Hold for 45 seconds, then switch sides. This is a great addition to the pre-sleep protocol because it directly targets the nerve compression that causes nighttime leg and back tightness.
How to Get Rid of Back Tightness Fast When It Hits at 2 AM
Sometimes the tightness hits in the middle of the night, and no amount of pre-sleep protocol prevents it. When this happens, you need a fast intervention that doesn't require getting fully awake and ruining your sleep. Here are three strategies that work when you're in the fog of a 2 AM wake-up.
The 60-Second Mattress Stretch
If you wake up with your back in a knot, don't try to stretch on the floor. That will fully wake you up and make it harder to fall back asleep. Instead, do this stretch in bed: roll onto your back, pull your knees toward your chest one at a time, and hold each for 30 seconds. This is a gentle traction that targets the lower back without requiring you to get up.
What can go wrong: if you pull both knees to your chest at once and your back is already spasming, you can aggravate it. Do one leg at a time, and only pull until you feel a mild stretch, not pain.
Heat vs. Ice: What Actually Works at Night
There's a lot of confusion about heat and ice for back pain. The rule is simple: ice for acute inflammation, heat for chronic tightness. Nighttime back tightness is almost always the chronic kind - it's muscle guarding and tension, not acute injury. So heat is your friend.
But the thing nobody tells you about heat is that it's most effective when applied before you sleep, not during the night. If you wake up at 2 AM with tightness, you don't want to get up and mess with a heating pad. That's why the pre-sleep protocol includes a heat element if you need it: a 10-minute warm shower or a heating pad on your lower back while you do the 90/90 breathing. This raises tissue temperature and increases blood flow, which helps the muscles relax.
The Dramamine Trick (Not What You Think)
Okay, this is not about motion sickness. But there's a specific type of over-the-counter muscle relaxer that some people find helpful for nighttime back tightness: magnesium. Not a prescription, not a supplement - just a topical magnesium spray applied to the lower back before bed. Magnesium is a natural muscle relaxant, and applying it topically bypasses your digestive system, which is helpful if you have a sensitive stomach.
I'm not recommending this as a medical treatment, and you should talk to your doctor before trying any supplement. But anecdotally, many people find that a magnesium spray applied to the lower back 30 minutes before bed reduces nighttime cramping and tightness. It's worth mentioning because it's a tool that most articles don't cover, and it addresses the mineral deficiency that can contribute to muscle spasms.
Mattress and Bedding Choices: What Actually Matters
If you've been sleeping on the same mattress for 10 years and waking up with a tight back, the mattress might be part of the problem. But the answer is not automatically "buy a firmer mattress." The research is actually mixed on mattress firmness and back pain. What matters more is whether your mattress supports your specific sleeping position and body weight.
For back sleepers, a medium-firm mattress is often recommended because it supports the natural curve of your spine without excessive sinkage. For side sleepers, a slightly softer mattress allows your hips and shoulders to sink enough to keep your spine aligned. For stomach sleepers, a firmer mattress is better because it prevents your pelvis from sinking into extension.
But here's the non-obvious insight: the lifespan of a mattress is not a fixed number. It depends on your weight, how much you move at night, and the quality of the materials. A good rule of thumb is to check for visible sagging or to test it by lying in your usual sleep position. If you feel a dip that's more than an inch, it's time to consider a replacement.
One more thing about bedding: the pillow under your head matters for your back, not just your neck. If your pillow is too thick, it pushes your head forward, which flattens your cervical spine and can create a chain reaction of tension down your back. The right pillow height depends on your sleep position. Side sleepers need a thicker pillow to fill the gap between their ear and shoulder. Back sleepers need a thinner pillow to keep their neck in a neutral position.
Stress and Sleep: The Muscle Guarding Loop
You can do every stretch and use every pillow correctly, but if your nervous system is stuck in fight-or-flight mode, your back muscles will stay tight. This is the muscle guarding loop: stress keeps your back muscles contracted, which sends pain signals to your brain, which creates more stress about the pain, which keeps the muscles contracted.
The way to break this loop is not to force relaxation - it's to signal safety to your nervous system. The 90/90 breathing from the pre-sleep protocol is one way. Another is progressive muscle relaxation, which involves tensing and then releasing each muscle group from your feet to your head. This gives your brain a clear signal that it's time to let go.
If you're someone whose back tightness is directly linked to stress, you might benefit from a broader wind-down routine. As we covered in our guide to unplugging from devices before sleep time, the blue light from screens can suppress melatonin and keep your nervous system active. Pairing that with the breathing protocol is a powerful combination.
Most people don't realize this, but the state of your mind before bed is as important as the state of your spine. If you're lying in bed replaying the day's stressors, your body is still in a low-level stress response. The back tightness is just the physical manifestation of that mental tension.
Advanced Techniques: Decompression Tools and When to Use Them
If you've tried the basic protocol and still wake up tight, there are advanced tools that can help. These are not for beginners, and they come with their own risks, but they can be effective for specific cases.
Inversion Tables
An inversion table lets you hang upside down at an angle, using gravity to decompress your spine. The research on inversion tables for back pain is mixed, but some people with chronic compression find them helpful. The key is to start at a low angle - 20 to 30 degrees - and only use it for 1 to 2 minutes at a time. What can go wrong: if you have high blood pressure, glaucoma, or a history of stroke, inversion is contraindicated. Always talk to your doctor before using one.
Foam Rolling - The Right Way
Foam rolling is popular, but most people do it wrong. They roll directly over the painful area, which causes the muscle to contract in protection, not relax. The right way is to roll the muscles around the pain. For lower back tightness, that means rolling your glutes and your hamstrings, not your lower back itself.
Spend 60 seconds rolling each glute, and 60 seconds on each hamstring, before the pre-sleep protocol. This helps release the tension that pulls on your pelvis. Avoid rolling your lower back directly - it's too easy to compress your spine further.
Massage Guns - Use Them on the Right Spots
Massage guns can be effective for releasing muscle knots, but they're not for the spine. Use them on the muscles that connect to your back: your calves, hamstrings, glutes, and the area between your shoulder blades. Avoid the spine itself and any area where you feel sharp pain.
The thing nobody tells you about massage guns: they can actually increase muscle tension if you use them too aggressively. The goal is not to beat the muscle into submission. It's to stimulate blood flow and relax the muscle. Use the lowest setting that feels effective, and limit each muscle group to 60 seconds.
When Back Tightness Is Not a Sleep Problem
This article is about sleep, but I need to be honest about the limitations. Not all back tightness is caused by sleep positioning or stress. Some is caused by underlying medical conditions that no pillow or stretch will fix. If you experience any of the following, you should see a doctor before trying to solve this on your own:
- Back pain that radiates down your leg past your knee
- Numbness or weakness in your legs or feet
- Loss of bladder or bowel control
- Unexplained weight loss alongside back pain
- Pain that wakes you up at night regardless of your position
These can be signs of a herniated disc pressing on a nerve, spinal stenosis, or in rare cases, a more serious condition. The pre-sleep protocol in this article is designed for general muscle tightness, not for acute injury or pathology.
The Weekly Reset: Building a Habit, Not a One-Night Fix
If you want lasting relief from nighttime back tightness, you need to think in terms of a weekly routine, not just a single night. The pre-sleep protocol is most effective when you do it consistently. Your body learns to associate the breathing and traction with the transition to sleep, and your nervous system starts to downshift more quickly each night.
Consider structuring your week like this: Monday through Friday, do the full 5-minute protocol. On the weekend, you can vary it - maybe a longer session on Saturday morning, or a focus on the stress-reduction aspect on Sunday night. The point is to make it a habit, not a chore.
For more on building a consistent sleep routine, check out our guide to a weekly routine for better sleep and focus. It covers the broader habits that support sleep quality, which will amplify the effects of the back-specific protocol.
Putting It All Together: Your Nightly Checklist
Here's the complete checklist to follow every night for the next two weeks. Print it, screenshot it, or memorize it. The key is to do it in order, because each step builds on the previous one.
- Hydration cutoff: Finish your last full glass of water 2 hours before bed. Have a small sip 30 minutes before starting the protocol.
- Heat (optional): If your back is particularly tight, take a 10-minute warm shower or apply a heating pad to your lower back while doing the breathing.
- Foam rolling (optional): Spend 60 seconds each on your glutes and hamstrings. Skip the lower back.
- The 90/90 breathing reset: Lie on your back with legs on the bed edge, breathe for 2 minutes.
- Traction over the bed edge: Shift your position for 90 seconds of gentle gravity traction. Skip if you have disc issues.
- Targeted stretches: Low lunge for psoas (45 seconds per side), side-lying reach for QL (45 seconds per side), supine piriformis stretch (45 seconds per side).
- Get into position: Set up your pillows based on your sleep position. Side sleepers: thick pillow between knees and ankles. Back sleepers: pillow under knees and thin towel under lower back.
When I first started this routine, I made the mistake of doing the stretches and then immediately jumping into bed without the breathing. The result was that my muscles were stretched but my nervous system was still active, so the tightness came back within an hour. The order matters. The breathing and traction are what tell your body it's safe to stay relaxed.
Expect it to take about a week to notice a difference. The first night might not feel dramatically different, but by night three or four, you should find yourself waking up less stiff. And by the end of two weeks, the habit should feel automatic. That's when the real change happens - when you stop thinking about it and just do it, and your back thanks you for it.